Monday, December 29, 2008

Polymer Clay has gone Steampunk...

You have to check out the new polymer clay steampunk creatures from Christi Friesen! They are truly amazing! She has such creative ideas! Her website even has a free steampunk project to try!


picture was taken from cforiginals.com

Saturday, December 27, 2008

Fun with painting...

I have been having so much fun painting these little wooden people lately...

Here is a wooden box that I just finished painting like a house:

It is for my kids to play with their little wooden people in. I also painted the inside.
The furniture is made of wooden blocks that I also painted.

My son received a set of wooden blocks from Santa. They had fun making this today:

I plan on mod podge-ing some of them with mad scientist themed things (my son is very interested in science right now). I can see some of the cylinders as test tubes, etc... I got the idea from The Unexpected... , who was featured on The Crafty Crow. I will share them...when...and if I do it!

Wednesday, December 24, 2008

Merry Christmas!

... and Happy Holidays!
My kids and I made this Merry Christmas sign today. It was so much fun, and now I have something really special to add to our collection of Christmas decorations. When we pull it out next year, we will be able to remember how Sienna,2, colored/scribbled in the "M", how Ramona ,6, helped me write many of the letters, and how Charles, 4, colored in one of the "R's" like a candy cane! ....Oh, the memories:)...


It was easy to make too. All we needed was some construction paper, crayons, glue and twine. I was inspired to make it after reading this very inspiring and fun blog....who was inspired by this creative blog.

Monday, December 22, 2008

Little teddy bears

That's what we made yesterday. One for each of my kids. I made them out of their old shirts and dresses.

I think that I was inspired by the "Save Handmade" logo.

Have you voted at Change.org yet? That's an easy way to help save handmade.

Sunday, December 21, 2008

Felt make-up

This is what my 6 year old, Ramona, and I were up to yesterday...We made some felt make-up and a little ballerina doll.
(blush, blush brush, lipstick and a ballerina doll)

Thursday, December 18, 2008

What to do with a large cardboard box?

Make a house, of course!
My kids and I had fun making this today. It is more like a doll house, but my 2 year old could fit inside.


It even has a drive thru window! We had fun ordering up milkshakes and fries:)

Wednesday, December 17, 2008

And the Winner of the Cupcake Giveaway is...

My son, Charles, got to pick the winner today.


Congratulations Theresa N!
You are the winner of my cupcake giveaway!


Thanks to everyone who entered! There were 29 entries:)
Also, thanks to Blog Giveaways for helping me get the word out!

Tuesday, December 16, 2008

Polymer Clay Covered Light Switch Plate Tutorial

This is a tutorial that I made a while back. I just wanted to share it here on my blog too:)

Polymer Clay Covered Light Switch Plate Tutorial~
supplies:
light switch plate
polymer clay
liquid polymer clay
pasta machine
various tools

find inspiration

start with a blank light switch plate (plastic or wood are easiest...metal and ceramic would need extra prep work)
***please test bake your plastic switch plate before using. Some will melt, warp or bubble***

rough up surface
it will help the clay adhere better

cover surface with a thin layer of liquid polymer clay

roll out clay with the pasta machine (I used setting 3)
you want it thin, but not so thin that it is hard to work with
*if you don't have a pasta machine, you can just cover the plate with small hand flattened pieces of clay...you can use different color pieces to get a mosaic effect

place flattened clay on plate
you may have to use more than one piece, just smooth seam
trim off excess clay on back


next...decorate!
this is the fun part!
use inspiration from the room the switch is for to get ideas

if you feel that your background is not smooth or imperfect in spots...you can use various tools to make impressions or designs to cover them

be aware of where you will have to cut the holes for the switches and screws

don't forget to use a tiny bit of liquid polymer clay to attach the clay pieces that you add

cut holes for the switches and poke holes for the screws


clean up all edges
trim excess clay and smooth

bake according to directions on clay package...

cool...

and hang!


If you would like me to make a custom light switch plate for you...I have them in my Etsy shop.
Here are some others that I have made:


Monday, December 15, 2008

Toho Treasures on Sale

Hi!
I have marked all of our Toho Treasures 20% off. Sale ends December 21. If you have never used them...they are definitely worth a try! They come in many beautiful colors too!


Sunday, December 14, 2008

Giant Ginger Cookies Recipe

This is one of my favorite cookie recipes to make during Christmas time.


The recipe was taken from Better Homes and Gardens:


Giant Ginger Cookies
Makes: twenty-five 4-inch cookies
Bake: 12 to 14 minutes per batch


Ingredients
4-1/2 cups all-purpose flour
4 teaspoons ground ginger
2 teaspoons baking soda
1-1/2 teaspoons ground cinnamon
1 teaspoon ground cloves
1/4 teaspoon salt
1-1/2 cups shortening
2 cups granulated sugar
2 eggs
1/2 cup molasses
3/4 cup coarse sugar or granulated sugar
Directions
1. In a medium mixing bowl stir together flour, ginger, baking soda, cinnamon, cloves, and salt; set aside.
2. In a large mixing bowl beat shortening with an electric mixer on low speed for 30 seconds to soften. Gradually add the 2 cups granulated sugar. Beat until combined, scraping sides of bowl occasionally. Beat in eggs and molasses. Beat in as much of the flour mixture as you can with the mixer. Using a wooden spoon, stir in any remaining flour mixture.
3. Shape dough into 2-inch balls using 1/4 cup dough. Roll balls in the 3/4 cup coarse or granulated sugar. Place about 2-1/2 inches apart on an ungreased cookie sheet.
4. Bake in a 350 degree F oven for 12 to 14 minutes or until cookies are light brown and puffed. (Do not overbake or cookies will not be chewy.) Cool on cookie sheet for 2 minutes. Transfer cookies to a wire rack to cool. Store in a tightly covered container at room temperature for up to 3 days or in the freezer for up to 3 months. Makes twenty-five (25) 4-inch cookies.
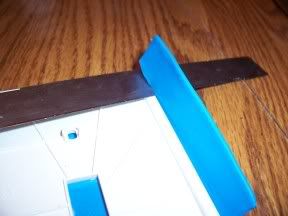
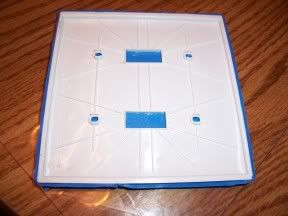
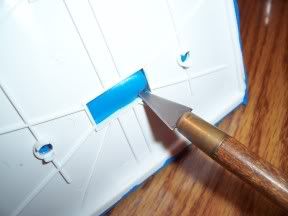
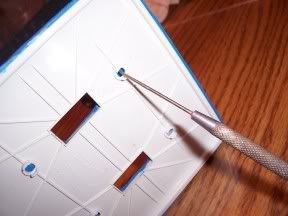
To Present This Gift... Stamp the bag as desired. Let the ink dry. Carefully roll down the top of the bag. Using a crafts knife, cut two slits wide enough to accommodate the ribbon on each side of the bag top. Thread the ribbon up through a slit on one side of the bag, then across the top and down through another slit on the other side of the bag. Bring the other end of the ribbon under the bag and staple or glue the ends together. Let glue dry. Repeat for the second ribbon. Line bag with parchment paper or waxed paper.
Also try this... Use permanent markers instead of stamps to draw designs on the paper bag.
To present this gift you will need: Stamp pad and stamp, brown paper bag, crafts knife, 2 yards of wire-edge ribbon cut into 1-yard lengths, stapler or thick white crafts glue, and parchment paper or waxed paper.

Saturday, December 13, 2008

Fun Finds...

I've decided to share some fun things that I have found online recently.
  • First, I wanted to share this wonderful blog that is full of great crafts to do with your kids. It is called the Craft Crow and would be a great resource for teachers too.
  • Here are some really cute, free printable gift tags from Inside a Black Apple. You can take maya*made's tips and print them on brown paper bags...for some "green wrapping and brown tagging". You also must check out her snowflake cutting tutorial.
  • Grosgrain shared a wonderful doll making tutorial from Martha Stewart.
  • I finally signed up for Project Wonderful and have free ad space on my blog! For some reason, I was really intimidated by it, but it turned out to be really easy to set up...
  • Creature Comforts has some free printable cards. They also have lots of other free printable items on their blog...like gift tags.
  • Xerox is giving us the opportunity to send free thank you post cards in support of our troops.
  • Tina T. has a great polymer clay tutorial on dried flowers.
  • A Foothill Home Companion shares how to make origami stars.
  • I have used this recipe many times, and found it a while back. It is a recipe for microwave caramel corn. It is really easy and would make a wonderful gift!